

This purse is really easy to sew, just make sure that you allocate two days for it because the glue needs to dry. So it's a good idea to split the process in two parts. I really like using Vilene fusible wadding for this purse, but I made same purses using heavy and light weight fusible interfacing, bamboo batting and sew-in interfacing. Use whatever material you can find, but make sure that it gives the purse enough stiffness and body.

Material:
- Metal Kiss Lock Frame
- Purse Template
- Fabric for outer layer
- Fabric for inner layer
- Vilene H 630 Fusible Wadding or any other material
- Strong Glue
- Sewing machine
- Threads, needles, scissors, fabric pens, pins
PART I: SEWING THE PURSE
Step 1: Fuse Vilene Fusible Wadding to both pieces of fabric.

Step 2: Lay the outer layer on the working desk with the wrong side facing up. Mark a line on the wrong side in the middle of the fabric, mark the middle of the line. Do the same with the inner fabric.

Step 3: Place the template on the line alining the middle marks. Trace the template. Note: Tie together two fabric pens and trace the template. You will get two lines, one to cut along and one to sew along. It's a great DIY tool for tracing patterns.

Carefully flip the template and trace the template on the bottom part of the fabric. Repeat the same with the inner layer.

This is what you should get after tracing the template.

Step 4: Fold the piece in half with the right sides facing each other. Pin. Cut out the pattern along the outer line. Do the same with the inner layer.

Make small marks on both sides about 1cm from points B and C and in the middle on the top.

Step 5: If you would like, at this stage you can add a small label to the inner layer of the purse.

Step 6: Stitch the sides together from the marks all the way down. Backstitch the seams.

Step 7: To make the boxed bottom, match the side seam with the middle of the bottom to create a point. Pin it. Measure 1.5cm from the top of the point and mark a line.

Step 8: Stitch along the marked line. Cut off the corners.

Step 9: Turn the inner layer the right side out. Carefully push the bottom corners out using a chopstick or a pencil, or a paper folding tool.

Insert the inner layer inside the outer layer. Push all the way to the bottom and align all the corners, side seams and middle marks. Pin both pieces together. As you can see, the inner layer is slightly longer than the outer layer. Mark an opening on top side of the purse about 6cm in length.

Step 10: On the back side stitch on the line all the way from the right side seam to the left side seam. On the front side stitch the same way but leave a gap in the middle.

Step 11: Trim excess fabric and make small cuts along the curved sides.

Step 12: Carefully turn the purse the right side out. Push all the corners and seams out. Note: I am using paper folding tools that I just found at a craft store, they work much better than a chopstick.

Step 13: Pin the gap together and stitch very close to the edge.

PART II: ATTACHING THE KISS LOCK FRAME
This is the the fun part and a messy one too. Make sure that you have paper towels handy to wipe any glue spills.
Step 1: Open the frame. Using a match or a toothpick, apply glue to the inside of the frame. Be generous.

Step 2: Carefully insert the purse inside the frame. I like using small embroidery scissors for this step. Take your time, start with the sides of the purse and the top corners. Then push in the bottom corners, followed by the sides and the top part. Make sure that the purse sits nicely inside the frame all the way around. Wipe any glue spills. Now you have to leave your purse for a good few hours for the glue to dry. I usually leave it overnight.

Step3: I like using embroidery floss for the next step of a matching colour. This time I am using yellow. Take four threads and pull them through wax a few times, it will give your threads more strength.

Backstitch all the way around making sure that the stitches are very close to the frame on the inside of the purse.


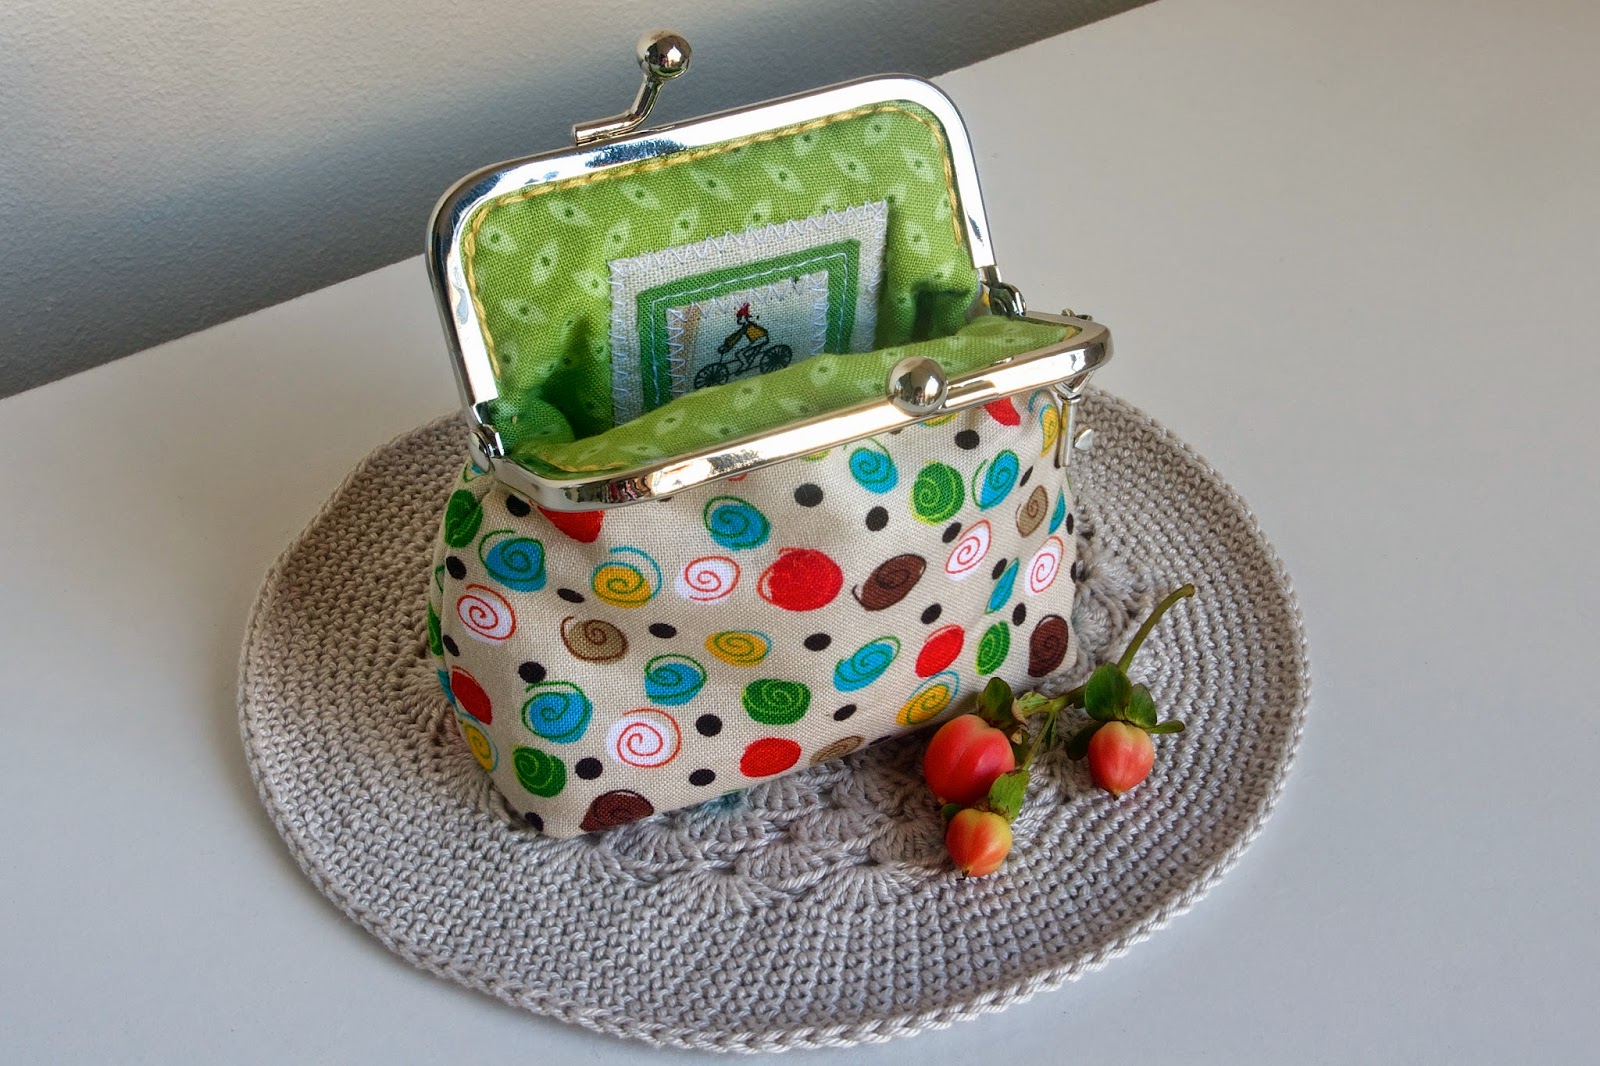
This is how it should look like inside once you are done.

Your own kiss lock coin purse is now ready to be used. Enjoy!

Please feel free to contact me if you have any questions. Simply leave me a comment here or send me an email. Oh, and one more thing, if you use this tutorial, I would love to hear about or see your creations. Have fun! Larisa xo
Wonderful tutorial! Thanks! I've been wanting to make one of this for a while, perhaps now I will :-).
ReplyDeleteThank you very much! These purses are really fun to make and don't take that long as well. I hope you make some. :-)
Deletecute fabric, cute frame, cute purse, cute tute :)
ReplyDeleteThank you, Gina! :-)
DeleteLovely tutorial! Thnx for sharing :)
ReplyDeleteThank you and you are welcome! Glad if it helps in any way. :-)
DeleteHI there,
ReplyDeleteWhat do you mean in step 4-Make small marks on both sides about 1cm from points B and C and in the middle on the top? Do you mean make small marks from points C and D and A? Thank you!
Hi Ginger,
DeleteIf you look at the photo in Step 3, you would see a horizontal line that is 1cm below points B and C. This line "meets" the left and right sides of the template and that's where you need to place the marks (you will be stitching the sides of the purse from these two marks down). As for middle of the top, just mark where point A is (this mark is to help you align the inner and outer layers). I hope this helps. Let me know if you need any further help. Thank you for visiting. :-)
Thank you so much for the quick response! I will try it when I have time :)
ReplyDeleteI cannot seem to find the coin purse template? Did you take it down?
ReplyDeleteHi Beth, sorry it took me so long to get back to you. Since the kiss lock frames come in different shapes and sizes, I did not provide a particular template, but showed how I constructed one for the frame I had. Here is the link for the template construction: http://stitchingnotes.blogspot.com.au/2014/06/tutorial-kiss-lock-purse-template.html
DeleteHope it helps. Larisa
Hi Larisa love your purse thanks for instructions. I bought the clip and made my own pattern 3 tries to get right LOL. But Im having trouble on set 9-10. I can't get those corners without it looking bulky and twisted. Im a novice at all this can you please help. Thanks so much.
ReplyDeleteHello, you can try trimming the corners less than 1/4". Try ironing the seams open both on the outer and inner layer to keep them flat.
DeleteWhat do you mean by twisted? You can take a photo of your work and send it to me directly to: larisa@stitchingnotes so I can have a look at it and try helping you out. :-)
email: larisa@stitchingnotes.com
DeleteCoin wallets provide a designated space to store and organize loose change. Instead of rummaging through your pockets or bag to find coins, you can keep them neatly contained in a coin wallet. This helps prevent coins from getting lost or mixed up with other items.human made wallets
ReplyDelete